Showing posts with label Christmas Parent Gifts. Show all posts

Tuesday, December 2, 2025

Fingerprint Wreath Photo Ornaments: Simple Christmas Craft for the Classroom

Looking for a quick, easy, and inexpensive Christmas gift your students can make for their parents? 

Fingerprint Wreath Ornament

These Fingerprint Wreath Photo Frame Ornaments are fast, simple, and absolutely adorable. 

Wreath Photo Frame Ornament

They turn tiny fingerprints into a keepsake ornament families will treasure for years!

DIY Wreath Frame Ornament

Below are the step-by-step directions to help you make these festive fingerprint wreaths in your classroom:

Step 1: Gather Supplies

Winter Crafts

You will need: green Tempera paint (two shades), red Tempera paint, Q-tips, scissors, a hole punch, ribbon, white cardstock, and student photos.

Step 2: Add Student Photos

Picture Frame Craft

Take a picture of each student and insert their photo into this PowerPoint. Resize each image to about 2.5 inches tall so it fits neatly inside the boxes on the page. This will ensure the photo is the correct size for the wreath opening.

Step 3: Edit Name Plaques

Parent Gift Ornament

In the PowerPoint file, type in each student’s name, grade, and the school year to create a name plaque for each student's wreath. Adjust the font style and size as needed.

Step 4: Print Wreath Templates

Wreath Ornament for Parents

Choose your wreath design. Options include a blank wreath or one with the year. 

*The year is editable in the PowerPoint file so you can reuse the template each year.*

Print on white cardstock and cut out the wreaths. 

Step 5: Fingerprint Greenery

Fingerprint Wreath Craft

Pour both shades of green paint onto a paper plate. 

Christmas Craft for Kids

Have students dab their finger in the paint and fill the wreath with fingerprints. They can place prints randomly, create a “V” pattern, overlap them, or mix the shades.

Step 6: Add Red Berries

Christmas Ornament Craft

Cut the tips off Q-tips.

Student-Made Parent Gift

Place a small amount of red paint on a plate and have students dab tiny red dots onto their wreath using the end of the Q-tip.

Step 7: Color the Ribbon

Classroom Christmas Craft

Have students use markers to color a ribbon for their wreath.

Holiday Craft for Kids

They can color a solid design or create a fun pattern. 

DIY Fingerprint Ornament

Have the students cut out the ribbon and glue it to the top (or bottom) of their wreath.

Christmas Fingerprint Craft

Step 8: Attach Student Photos

Handmade Christmas Gift for Parents

Kid-Made Christmas Ornament

Tape each student’s photo to the back of their wreath so the face shows through the center.

Step 9: Add Name Plaque

DIY Photo Ornament for Kids

Glue or tape each name plaque onto the wreath. 

Kid Fingerprint Christmas Wreath

You can attach it to the front or back—your choice.

Step 10: Laminate

Preschool Christmas Craft

Laminate the wreaths for durability, then cut them out again after laminating.

Step 11: Punch a Hole

Keepsake Christmas Ornament Craft

Use a hole punch to make a small hole at the top of each wreath for the ribbon.

Step 12: Add Ribbon for Hanging

Easy Christmas Craft for the Classroom

Thread ribbon (3/8-inch works nicely) through the hole. 

Winter Crafts for Kids

Tie a double knot and trim the ends.

Step 13: Finished Ornament

Simple Holiday Crafts for Students

Your adorable keepsake ornament is complete!

Fingerprint Wreath Ornament DIY

These turn out so cute and make such meaningful holiday gifts.

Step 14: Wrap the Gift

Snowman Bag Craft

Have students wrap their ornaments. 

Snowman Bag Gift Bag

(I use my printable Snowman Gift Bag found HERE in my TPT store.)

Fingerprint Wreath Photo Frame Ornament

Your parent gifts are ready to go home!

Fingerprint Wreath Photo Ornaments

There are so many different ways you can customize these wreaths. 

Simple Christmas Craft for the Classroom

Grab everything you need to make the Fingerprint Wreath Ornaments HERE!

Wreath Photo Ornaments

Monday, February 24, 2025

I Love You to Pieces Craft | A Great Mother's Day Student-Made Gift Idea

Looking for a meaningful, easy-to-prep craft that your students can gift to someone special?  This "I Love You to Pieces" writing prompt and craft is the perfect student-made gift for Mother’s Day, Father’s Day, Grandparents’ Day, Valentine’s Day, or any special occasion!

Mother's Day Craft

Father's Day Craft

This craft is perfect for all ages!  It works well for students as young as Pre-K all the way through late elementary grades.

Grandparents Day Craft

How it Works:

Students will tear pieces of construction paper and use them to fill in two heart shapes, creating a colorful mosaic effect.  

I Love You to Pieces Craft

While having fun with the rip-and-tear technique, they’ll also develop fine motor skills.  

I Love You to Pieces Printable

Best of all, it’s a simple to prep and budget-friendly craft!

I Love You to Pieces Freebie
 

What’s Included?

1 Ready-to-Print PDF (Not Editable)

1 Picture Template

 I Love You to Pieces

How to Complete the Craft:

 Color - Students begin by coloring their papers using markers or crayons.

Student Made Parent Gift

2.   Writing Prompt – Students complete the prompt about someone special they love and why.  Encourage them to use complete sentences and add meaningful details.

Parent Gifts Made By Students

3Heart Collage – Provide students with a variety of construction paper colors.  Have them tear the paper into small pieces (no scissors needed!) and glue them inside the hearts to create a mosaic effect.  

**TIP* Encourage students to start with the edges of the hearts first, then fill in the centers.

Parent Christmas Gift

Add a Picture – Take and print a 4x6 photo of each student.  

Grandparents Day Gift

Mothers Day Gift

Using the template, cut the pictures down to size and glue them into the frame.  

Fathers Day Gift

No photos?  No problem!  Students can draw a self-portrait instead.

Laminate – Once the craft is complete and the glue has dried, laminate for extra durability. 

Valentines Day Parent Gift

       Gift Time! – Students are ready to surprise their special someone with their heartfelt, handmade keepsake.

 Parent Gift Craft Ideas

This
quick, easy, and budget-friendly craft is a perfect, meaningful gift for any special occasion.  Whether for Mother’s Day, Father's Day, Grandparents’ Day, or Valentine’s Day, it’s a keepsake that families will cherish for years to come!

Student Made Parent Gifts

I Love You to Pieces Printable Craft

Click HERE to download the "I Love You to Pieces" Printable from my TpT store!

Tuesday, December 17, 2024

Snow Globe Ornaments {Student Made Parent Gift for Christmas}


Looking for a quick, easy, and inexpensive gift for your students to make for their parents for a Christmas gift?

Snow Globe Ornament

These Snow Globe ornaments are fast and simple to make!

Snow Globe Ornament Parent Gift

They are also a great keepsake for parents!

Snow Globe Ornament Craft

Here are the steps on how to make these Snow Globe ornaments:

Snow Globe Craft

Step 1:

Snow Globe Ornament Kid Craft

First, take pictures of each of your students.  You can have them put on their jackets, hats, gloves, etc. for the picture OR if you have a Christmas PJ day, you can also take pictures then.

Step 2:

Snow Globe Ornament Kid Craft

When taking each student’s picture have them pose as if they are having fun playing in the snow.  They can pretend they are throwing a snowball, building a snowman, etc.

Step 3:

Snow Globe Ornament Kid Craft

Snow Globe Ornament Christmas Craft

If you have an iPhone, you can remove the background in each student’s picture by simply holding your finger down on the student in the image.  Then select the options: Share then Save Image.  

Snow Globe Ornament Christmas Craft

This will now be saved as a new image in your phone.


Step 4:

Snow Globe Ornament Christmas Craft

Add each student’s picture to this PowerPoint presentationResize the image to about 2.6 inches in height.  Each student’s picture should fit inside one of the boxes.

Step 5:

Snow Globe Ornament Christmas Craft

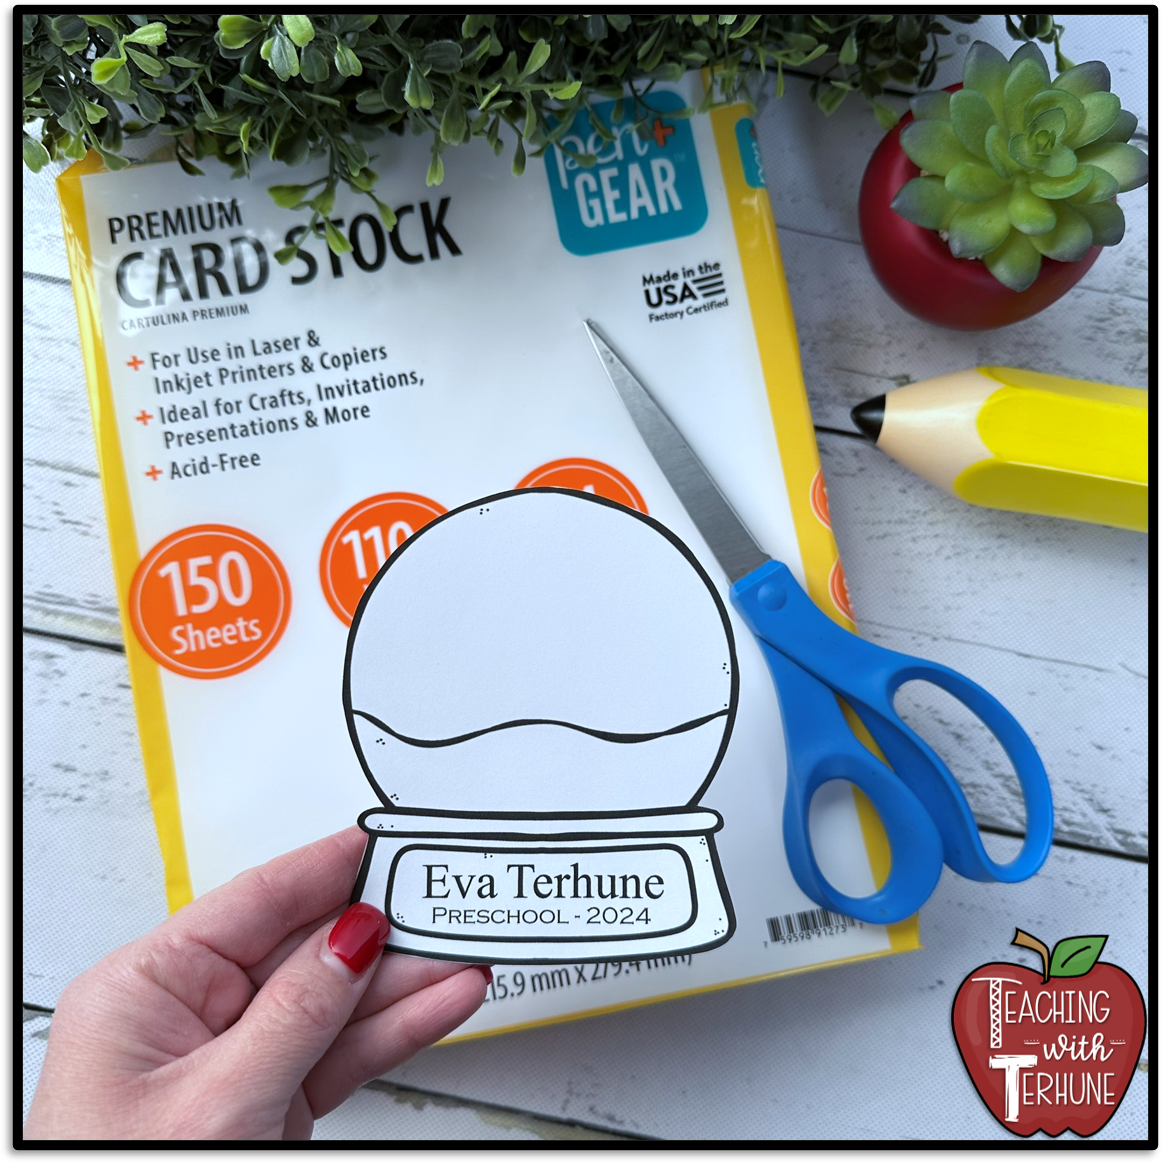
Next, type in each student’s information on each snow globe.  Fill in their name, grade level, and the school year.  You can edit the font style and size to your liking.

Step 6:

Snow Globe Ornament Christmas Craft

Next, save the PowerPoint as a PDF.  To save as a PDF select File Export Create PDF./XPS Document.  Print from the PDF file you just created.  *You must print from the PDF or else the text and images won’t print together.

Step 7:

Snow Globe Ornament Christmas Craft

Print the images of the students on regular copy paper. 

Print the snow globes on white cardstock paper.  Then, cut out each snow globe.


Step 8:

Christmas Crafts

Next, have your students use watercolors to paint the sky light blue.  I have found that the light blue water colors look the best for the sky.  It has a pretty sky look and it doesn’t leave those harsh color lines like markers or crayons do.

Step 9:

Christmas Crafts

Next, have your students color the base of their snow globe however they would like.  I like for my students to use crayons on this part.  They can color their base a solid color or add a fun design.

Step 10:

Christmas Crafts for Kids

Once everything is colored, cut and glue each student’s picture onto their snow globe.  

Christmas Crafts for Kids

Place their picture as low down as you can in the globe so you have plenty of room to add a hole punch up top.

Step 11:

Snow Globe Ornament Christmas Craft

Finally, to make the snow, have your students use bottle glue in the areas they want the snow in.  Then have them add white glitter on top of the glue.

They can add snowballs in their hands, snow falling in the sky, etc.


Step 12:

Snow Globe Ornament Christmas Craft

*Tip*  If you are going to laminate the snow globes have the students go light on the glue and glitter.  If you are not laminating them they can go as heavy as they would like on the glitter/glue.

It’s very important to let the glue/glitter completely dry before moving on to the next step.  Here are some examples of what can go wrong if you don't let the glue dry completely.  


Snow Globe Ornament Christmas Craft

The marker and glue bleed together.

Snow Globe Ornament Christmas Craft

I learned the hard way.  LOL  So just make sure everything is completely dry before moving on to the next step.

Step 13:

Snow Globe Ornament Christmas Craft

Once everything is completely dry I like to laminate the snow globes.  

Snow Globe Ornament Christmas Craft

I like to leave a little clear edge around the snow globe when cutting it out to help the lamination stay together.

Step 14:

Snow Globe Ornament Christmas Craft

Using a hole punch, add a small hole at the top of each snow globe.

Step 15:

Snow Globe Ornament Christmas Craft

Tie a ribbon through that hole.  I like to use ribbon that is 1/4 inch in size.  Double knot it at the end and cut off any extra ribbon.

Step 16:

Snow Globe Ornament Student Made Parent Gift

Then, I also like to tie another piece of ribbon onto the first piece.  I use this piece to form it into a pretty bow.  I like to use ribbon that is 3/8 inch in size.

Step 17:

Snow Globe Ornament Student Made Parent Gift

The ornament is now complete!

Snow Globe Ornament Parent Gift

These ornaments turn out so cute and are a sweet keepsake parents can put on the Christmas tree each year!


Snow Globe Ornament Parent Gift

Step 18:

Snow Globe Ornament Parent Christmas Gift

Have your students wrap their ornament.

Snow Globe Ornament Parent Christmas Gift

I have this printable Snowman gift bag that I use. 


You can find it on my TPT store HERE!


Snow Globe Ornament Parent Christmas Gift
 

Now your parent gifts are ready to send home!

 Snow Globe Ornament Parent Christmas Gift

 
Snow Globe Ornament Christmas Craft

Grab everything you need to make the Snow Globe Ornaments HERE!