Showing posts sorted by relevance for query small groups. Sort by date Show all posts

Wednesday, December 16, 2015

Easy, Low Maintenance, and Quiet Literacy Centers!

 
I used to hate literacy center time during the day!   It seemed like I would have so many interruptions as I was trying to read with my small group that I would only become frustrated and not want to do literacy centers each day.  I would have interruptions because students didn’t know what to do at their center, students asking to go to the bathroom, behavior management interruptions as some students would rather sit and play with their pencil than do their assigned work at their literacy center.  I also would have students who would build up an insane amount of unfinished work in their desk from centers each week.  Over the years I have tried so many different center ideas.  I spent so much time planning and copying things for centers each week.  Every year I tried something different for center time in hopes to find something that worked. 
FINALLY, I came up with centers that I love!  They are very low maintenance so I don’t have to spend so much time planning and copying for them.  They require little to no paperwork so my students don’t have unfinished work that continues to pile up in their desk.  AND most importantly they are designed to keep the students engaged, learning, and quiet during literacy center time.
Before starting the full rotation of centers at the beginning of the school year, I spend about a week or two teaching each center carefully.  We set a center rule that if you are at a center where you have to wear headphones then it’s a no talking center.  We talk about why this would be important, how people could end up talking really loudly when they have headphones on, etc.  This rule makes a huge difference with the noise level during center time.  You will see below that many of my centers require headphones.  This simple element helped transform my center time into a quiet and peaceful time. 

We also spend time talking about what a whisper is.  The students know that if they are at a center without headphones then they may talk with their partners – but only in a whisper.  We practice putting our hand on our neck as we talk.  If we can feel the vibration then it is not a whisper.

We also fill out a T-Chart on what the students & teacher expectations are.  You will see in the pictures below each literacy center has the T-chart at the center to remind the students on what they should and should not be doing during center time.
Here is a look into my 8 literacy centers….
Center 1: Writing Center


At the writing center the students choose one item from the board to complete.  For example, the students start off the school year with just simple sentence writing.  They will write one, two, three, or four sentences about a topic.  If they need help deciding on a topic to write about they can look to the writing prompt calendar posted on the board.  As the year goes on I add new writing item choices such as opinion writing, informative writing, etc. I add these items to the board as a choice once we learn how to write them during writer’s workshop.

Click HERE to download my complete Writing Center Board and Writing Papers from my TpT Store!

Click HERE to download my Writer’s Workshop Lessons and Activities from my TpT Store!

Center 2: Computers
 
I have two student computers in my classroom.  During center time the students at the computer center can access my classroom website.  My website has many different and fun learning websites they can go to.  This is a headphone center, so no talking is allowed at this center.  As you can see, the T-chart lists the step-by-step directions on how they can get to my website.  The students know they can only visit the websites I have listed on my page.
Click HERE to go to my Websites for Kids page!

Center 3: Listening Center
 
 
Throughout the years I have purchased books on CD through Scholastic.  As you can see from the picture I have a portable CD player, headphones, and a folder with a worksheet for each individual book.  The center has three books to choose from.  This allows each student their own book instead of having to share and fight over who gets to hold the book, not being able to see, etc.  After listening to the book the students complete some type of story element worksheet over the book they listened to.  Each week the students choose a book at the center they have not listened to before.  This allows the center to only have to be changed every three weeks!  Since headphones are used at this center the students know that this is a no talking center.
*The red and green dots placed on the portable CD players indicate to the students which button they need to push to start, stop, and turn off the CD player.

Center 4: Learning Puzzles
 
At the learning puzzle center I have the students complete some type of puzzle or activity over a skill that we have learned and are practicing in class.  During center time the students work together to complete the puzzle or activity.  If they finish before center time is up they can rework it or read a book from their book basket at the center as they wait.  As you can see from the picture the puzzle I had in the tub for that week had the students practicing with rhyming words.  I switch this center out every week by simply placing some type of puzzle or TpT activity in the tub. 

Center 5: iPad Games
 
At the iPad game center the students grab an old iPhone with headphones and begin playing learning game apps!  The phones are filled with math, language, reading, etc. apps that keep the kids learning in a different and fun way.  Yup, another headphone center.  So the students know it’s a no talking center.  Anyways the kids get so wrapped up in their game that they don’t even want to talk to the kids at the center with them. 

Click HERE to read my blog post on how I transformed old iPhones into great learning tools for the students.

Center 6: Meet with the Teacher
 
In the past, while the students were at their literacy centers I would pull a small group over to read with them.  I usually had three groups.  A group for my high, average, and low readers.  I would usually have some sort of book that we would read together as a small group.  Sometimes I would also have some sort of activity we would do.  This also took a lot of prep time.  I found that even with all my hard work prepping and planning - what I was doing during small groups wasn’t really effective for all my students.  Grouping my whole class into three groups really did not work for me in 1st grade.  Within my low group I would have a WIDE range of reading levels.  As my class size continued to grow each year I had to change the way I was doing my small group time. 
Now instead of reading with a small group of students – I read one-on-one with my students.  This insures that I am hitting the reading needs of that individual student.  During literacy center time I call a student at a time to come read with me at my table.  (I call the students that are at Center 6 first, then pull additional students over from Center 7.)  They bring over one of their books from their book basket that is on their individual reading level and start reading it to me.  While they are reading to me I use that as an opportunity to reteach, remind, and/or practice things we have learned in class.  


 I use this check list to ensure that I am reading one-on-one with each of my students the appropriate amount of time depending on their reading level.  For my low readers I try to have them read to me one-on-one at least three times each week.  My average readers I try to read one-on-one with them twice a week.  My high, independent readers I try to read with them at least once a week.  Since my centers run pretty smoothly and quietly I can easily read one-on-one with 10-12 students a day.
 
 
Click HERE to download my One-On-One Reading Checklist from my TpT Store!

Center 7: Read to Self
 
At the Read-to-Self center the students read books from their book basket quietly to themselves.  Their book baskets are filled with books on their individualized reading level.  I have phones they can read into, word tracker bars, etc. they can use to help them if they would like.  The students reading at this center also get called to read one-on-one to the teacher.

Center 8: Word Work
 
At this center the students are equipped with a teacher chart, pointer, marker, and eraser.  The students get to pretend to be the teacher.  They practice coding and reading the words.  They call on their “students” to help as well.  This chart came with our Treasure’s Reading series.  As you can see from the picture the words on the chart are grouped by concept.  So after I have taught a certain concept in class, the students practice coding and reading words with that concept at their literacy center.


 In order for the students to know what literacy centers they go to each day they look to the center rotation wheel.  Each section of the wheel has 2 to 3 names written in it.  Each day the students go to the rotation wheel and find their name in order to know what center they go to that day.  When that center rotation is over (about 25 minutes later), the students follow the arrows that are next to their name on the rotation wheel to know what their next center is.  After centers that day the rotation wheel gets turned a quarter turn and is ready for the next day!  We do two literacy centers Monday through Thursday to complete the wheel rotation.  Fridays are the days we do our Fun Friday Centers.  Check out my blog post HERE to read more about Fun Friday.

Click HERE to download my Center Setup from my TpT Store!
To help with bathroom break interruptions during center time I created this restroom break system.  This is a picture of the restroom break system I use.
 

 When the green sign is posted the students (one at a time) may move their number next to the restroom sign and take the pass and go without having to ask the teacher!  This prevents students from raising their hand and asking to go to the restroom in the middle of your teacher led lessons or interrupting your readers during literacy center time!  You can easily keep track of who is out of the classroom by looking at the numbers placed next to the boys and girls restroom signs.

During my teacher led lessons I’ll switch the sign over to red.  This shows the students that they may not leave the classroom at that time to take a restroom break (unless of course it is an emergency) because I am teaching, giving directions, or doing something important they can’t miss.
 
Click HERE to download my Red/Green Restroom Break Signs from my TpT store!

Click
HERE
to download my Boy/Girl Restroom Break Signs from my TpT Store!

Click
HERE
to download my Editable Passes from my TpT Store!


Thanks for reading!
 

Saturday, February 23, 2019

DR. SEUSS BOOK ACTIVITIES FOR READ ACROSS AMERICA WEEK!

I love to spend over two weeks in the month of March reading a different Dr. Seuss book to my students each day.  After reading the Dr. Seuss book, I have my students complete fun activities that go with it!

I like to begin my unit by talking about who Dr. Seuss was.  I go through my "Who Was Dr. Seuss" Anchor Charts that I made!

Here are just some of the Dr. Seuss activities we do after reading each book:

Green Eggs and Ham

After reading the book Green Eggs and Ham we used these charts to graph our responses to the following questions:


Instead of making actual green eggs and ham I like to make these cookies that look like green eggs and ham.  I don't show the cookies to the students until after they answer the anchor chart questions.  They always think they will be eating actual green eggs and ham.  They are always shocked and excited to see it is a cookie!  LOL


The Cat in the Hat


I have my students use their picture to make themselves into Thing 1 and Thing 2!


Mr. Cat Comes Back!


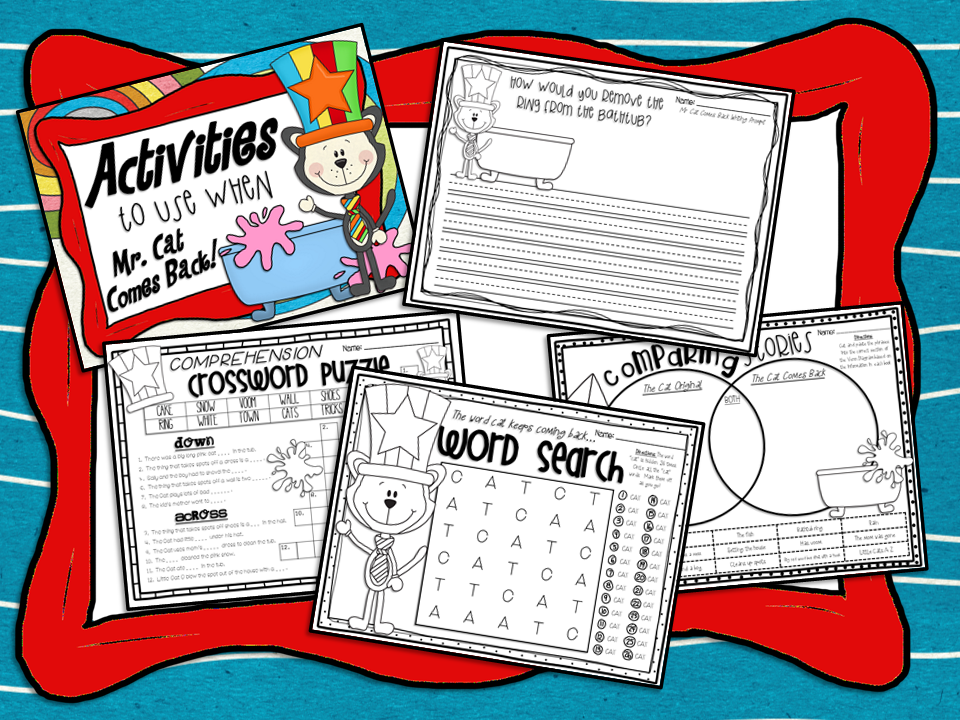
I always love to read the Dr. Seuss book: The Cat in the Hat Comes Back the day after reading the original version.  Here are some of the different activity pages I have my students complete after we read the book...

Activity 1: Comparing the two stories using a Venn Diagram

Activity 2: Writing Prompt: How would you remove the ring from the bathtub?

Activity 3: Comprehension Crossword Puzzle

Activity 4: Word Search


Click HERE to download these activities!

Feet, Feet, Feet!


The Foot Book is one of my favorite Dr. Seuss books!  There are so many great lessons and activities you can pair with this book!  After reading The Foot Book to my students we cover antonyms, adjectives, non-standard/standard measurement, skip counting, etc! 

Here is a look into some of the fun activities we do...


I like to teach a quick mini lesson on what antonyms are.  We use the brain storm chart together as a class to think of words that are antonyms.  I have the students complete the Antonym Foot Match worksheet as a quick assessment.

For a fun antonym activity, I give each student a pair of feet with one word written on a foot.  They have to think of the antonym to that word and write it on the other foot.  Finally, they illustrate what each word means.


I display the antonym feet on a large foot that I make out of butcher paper on my classroom door!


I like to place these activity at my literacy centers... 


For this activity, the students match the pair of antonym feet!


Here the students sort each flip flop depending on if it goes on the left or right foot.


I also like to review adjectives with my students using The Foot Book.  I like to slip in a quick review lesson on adjectives anytime I can since they can be so difficult for some first graders to understand! 


Here we review what an adjective is and brain storm adjectives that describe feet.  We fill in the foot chart together as a class.  Finally, I divide my students into small groups and give each group a copy of The Foot Book.  They work together to find adjectives in the book.  They record their answers on the worksheet.


For a fun non-standard measurement activity I have each student trace and cut out their foot.  They measure their foot using cubes, paper clips, and pennies.  They record their answers on their worksheet! 


This is another great non-standard measurement activity. I place long strips of masking tape on the floor of my classroom.  The students use their feet to measure the length of each line and record it on their worksheet.  After everyone is finished we discuss what answers each student got and why everyone got different answers.


Here is an example of a tape strip on the floor for the students to measure.
After we discuss why everyone got different answers we then discuss the actual foot measurement on a ruler.  I pass out a ruler to each student and they work together to measure each tape strip in actual feet for the second time around.  When everyone is finished we share our answers and discuss why everyone got the same answers now.

Here are some skip counting worksheets I like to place at my math centers. 


Click HERE to download these activities!


Fox in Socks

After reading the book, Fox in Socks we talk about what Synonyms are.  The students write a pair of synonyms on their pair of socks and illustrate what the words mean.


The Lorax

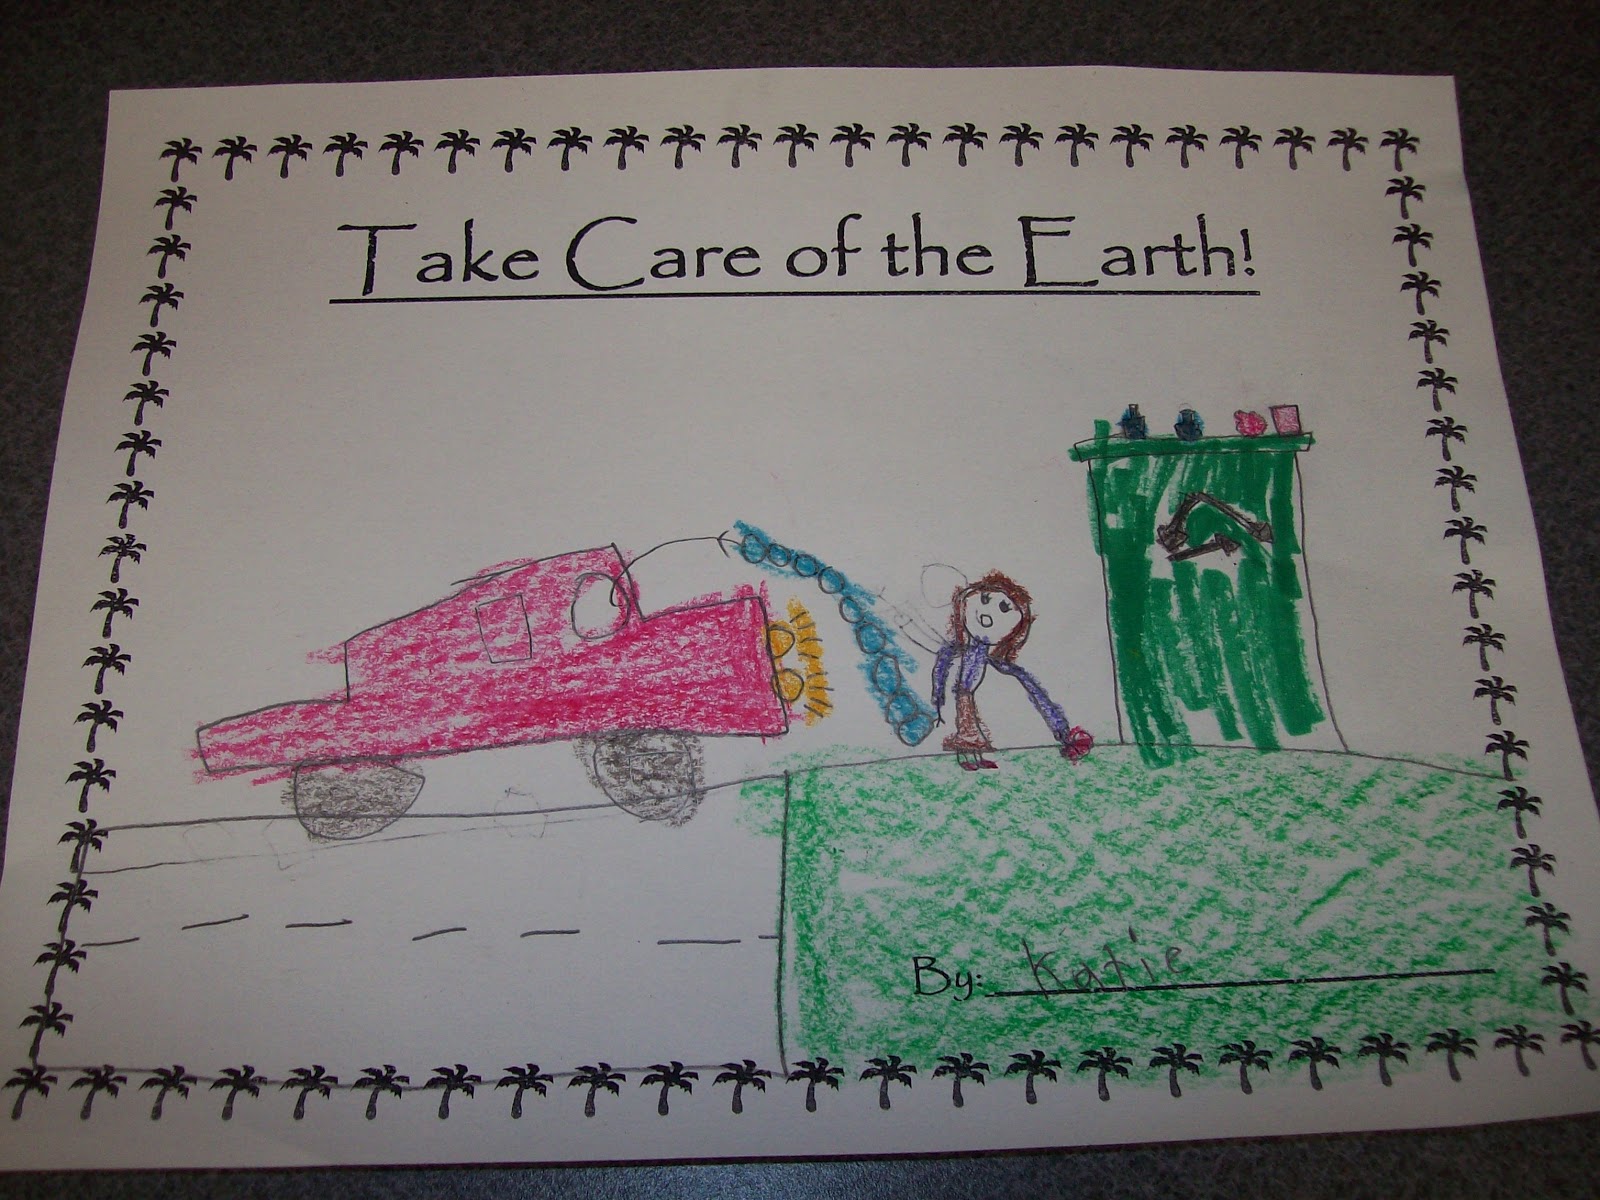
After reading the book, The Lorax we go through these story element Truffula Trees as a class!  Then, each student makes a poster on how they can take care of the Earth.


One Graph, Two Graphs, Three Graphs, More!


The Dr. Seuss book, One Fish, Two Fish, Red Fish, Blue Fish has so many great activities I like to pair it with...especially math activities!  


Here is a look into some of the fun activities we do with this book...


After reading the book to the students we discuss/review what an antonym is.  I reread the book to the students as they point out the antonyms they hear in the story.  We add the words on our T-chart.


I place this Fishing for Antonyms activity at one of my literacy centers.  My students LOVE this antonym center activity!  The fishing rod has a magnet on the end of it and the fish have brads in their eyes.  The students use the fishing rod to "fish" for words that are antonyms!

I have my students complete this antonym worksheet as a quick assessment on what they know.

Here are two other literacy center activities I place at my centers during the week.

For this activity the students play "Go Fish" for rhyming words.

Here the students sort the fish depending on if they have a real or non-sense word written on them.

I use Goldfish crackers for a lot of my activities.  I place the Goldfish in snack sized Ziploc bags and staple the bag toppers on!


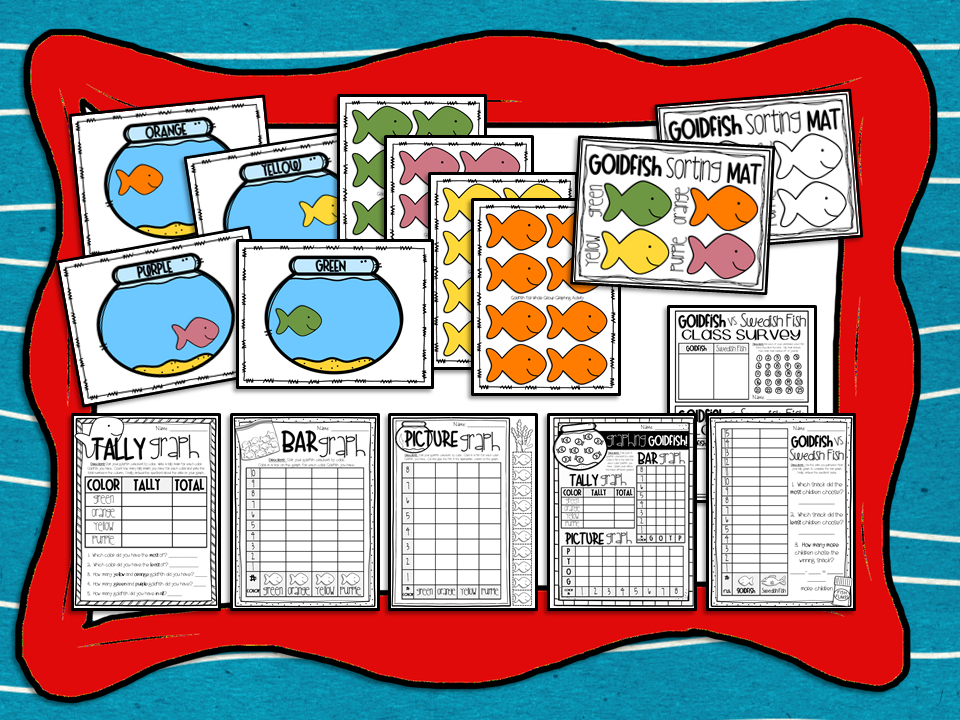
My students complete different graphing activities with the Goldfish crackers.  We learn and practice with Tally Graphs, Bar Graphs, and Picture Graphs!

Each graphing activity just takes 10 Goldfish crackers!

Tally Graph:

Picture Graph:

Bar Graph: 

Mixed Graphing Practice:

Class Survey Graphing Activity:
For this graphing activity the students get to taste a Goldfish cracker and a Swedish Fish.  Then, the students go around and ask each classmate which snack they liked better.  They tally the results and graph the data on a bar graph.

Making Estimations:
I set up two different estimation jars.  One jar is filled with Goldfish crackers and the other is filled with Swedish Fish.  The students guess how many fish are in each jar.  The student that gets closest to the answer gets to have the snack to take home.

Here is another estimation activity we do with Goldfish crackers.

Measurement Activities:
Not only do we use Goldfish crackers to graph...we also use them as a non-standard measurement tool.

My students love making a fish out of their own hand.  They use different measurement tools to measure the length of their hand/fish.

Goldfish crackers are perfect for making patterns with too!  :)

For this fraction activity the students get ten Goldfish crackers.  They write the fraction for each color.

Here are some additional math activities:


 Click HERE to download these activities!


Who Saves the Day?


After reading the Dr. Seuss book, Horton Hears a Who! we discuss a couple character traits that Horton has.  We fill in the chart together by listing the trait and the evidence in the story that made us think Horton had that trait.  I also have my students complete the character trait bubble worksheet on their own.


As a class, we also answer the Who, What, When, Where, Why, and How Questions about the story on the newspaper anchor chart.


Finally, the students get to make these super cute crafts! 


For this craft and writing prompt the students pretend they are a Who and write what they would say to Horton in the speech bubble.


For this craft and writing prompt the students fill in their name and a silly name of something they hear on their clover and write about it! 


I also have my students complete the following Venn Diagrams.


Click HERE to download these activities!


Up, Up, and Away We Go!


After reading the Dr. Seuss book: Oh, the Places You'll Go!  I have my students create a hot air balloon and suitcase craft.  Each one has a writing prompt that the students answer and attach to their craft.

For the hot air balloon craft the students pick one of the following writing prompts to write about....
Prompt #1: If I could go anywhere, I would want to go to... 
Prompt #2:  If I could be anything when I grow up, I would want to be a...


Underneath the hot air balloon is the student's writing.

Using silly student pictures would be super cute!

For the luggage craft, the students pick one of the following writing prompts to write about....
Prompt #1: Where I want to go...Why I want to go there...What I'm bringing with me...
Prompt #2:  Who I want to meet...Why I want to meet them...What I would bring them...

The suitcase has a luggage tag with the student's name on it.

The writing prompts are glued inside the suitcase!


Click HERE to download these activities!

The Alphabet Book Activities

 
After reading Dr. Seuss's ABC Book to my students, I have them complete the following activities...

Parts of Speech Word Search
For this activity, the students look for nouns, verbs, adjectives, and Dr. Seuss's original words in the ABC Book.

Class Alphabet Book
I assign each student a letter.  They think of a word that starts with that letter and fill in their page.  Each student shares their page with the class as we add it to our class book!

A through Z Scavenger Hunt
The students walk around the classroom to find items that start with each letter of the alphabet.  They write the word on their recording page.  I always like to make this a challenge with my students.  We like to see who can find the most words!

Literacy Center Work
I place this worksheet at a literacy center.  The students think of their own letter and words to complete their page.


The students also complete this letter match activity at their center.


Click HERE to download these activities!

There's Something in My Pocket!


There's a Wocket in my Pocket! by Dr. Seuss is another one of my favorites!  There are so many fun activities I like to pair with this book.  Here is a look at some of them...


After reading the book we think of as many words as we can that rhyme with the word pocket.  We add them to our anchor chart.


Then, I have my students create their own silly creature.  They add

their creature inside the t-shirt pocket.  They name their creature so it rhymes with the word pocket.  Finally, I have them write about their creature!


I like to break my students up in small groups and give each group of students the There's a Wocket in my Pocket! book.  They work as a group to find a pair of rhyming words.  Then, they decide which word is a real word and which word is a made up word by the author.  They write the words in the correct column on their page.


Instead of using a pocket...here the girls in my class create a creature, name it, and add it to their locket.  The boys in my class do the same, but for a rocket!


For this activity I have my students create a creature and add it to an object of their choice.  Then, they give their creature a name that rhymes with the object they placed it in.

(Large Version)

(Small Version)
This activity is so much fun for the students!  They secretly draw an object and add it to their pocket.  Then, they write three clues.  Each student will read their three clues to the class and see if their classmates can guess their object!  (I created a small version of this craft to make it a 1 page craft.)

I have my students create a class rhyming book.  For this activity I give each student their own page.  Each student creates a creature and completes their rhyming riddle.  Each student shares their page with the class.

I like to place these fun pocket sorts in my literacy centers for the week!

Long/Short Vowel Word Sort

Real Word/ Nonsense Word Sort

Rhyme/Don't Rhyme Word Sort


Click HERE to download these activities!


MOO! MOO! Onomatopoeia Activities for YOU!


The Dr. Seuss book: Mr. Brown Can Moo! Can You? is filled with lots of different onomatopoeias. I use this book as a fun way to teach a mini lesson on what an onomatopoeia is and to also review what a noun, verb, and adjective is.

Before reading the book I teach a quick mini lesson on what an onomatopoeia is.
After reading the book, I have the students give me some of the examples of the onomatopoeias they heard in the book.  I list all their examples on our Brain Storm T-Chart.


Then, as a class we complete the puzzle by matching the different sounds with what makes the sound.

We then create an onomatopoeia class book where each student completes the writing prompt:
I can go ____ like a/an _____. 

I have each student share their page when they are done and we add it to our class book!


Finally, we review the different parts of speech and sort the words on each hat. 


I have each student complete this worksheet independently at their desk.

Here is another chart I've made to review the different parts of speech.


Click HERE to download these activities!

Click HERE to download the bundle of activities!

To end our fun week of Dr. Seuss activities we eat these yummy hat cookies!  I made the hat cookie cutter out of a large metal can.  The can was shaped and the edges were sanded to make the hat cookie cutter!